
Published 2026-10-14 · DIYCarPlay Engineering Team · 10 min read
Bay Time Is the Real Cost: What a CarPlay Retrofit Install Actually Takes on the Bench
A retrofit module that keeps the factory screen is often sold on the promise of a two-hour job. The promise holds for some head units and collapses for others, and the difference is worth pricing before a workshop orders stock. Bay time on a CarPlay retrofit is decided less by the module than by what has to be opened, unclipped and reseated around it.
A CarPlay retrofit module is a Linux-embedded box that joins a factory display link and the vehicle network, then presents the phone's CarPlay interface on the original OEM screen. Nothing about that description implies a quick install. The screen, the head unit, the original buttons and the factory reversing camera all stay in the car. What changes is the set of connectors behind the centre console, and those connectors sit at different depths in different models.
For a workshop running ten, twenty or fifty of these a month, bay time is the number that decides whether the retrofit line is profitable. Here is where the minutes actually go, which parts of the job are fixed, and which ones scale badly with head-unit generation.
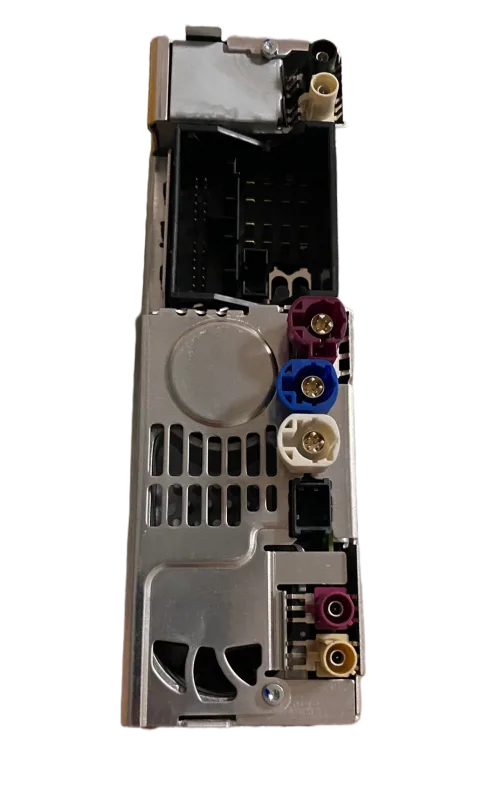
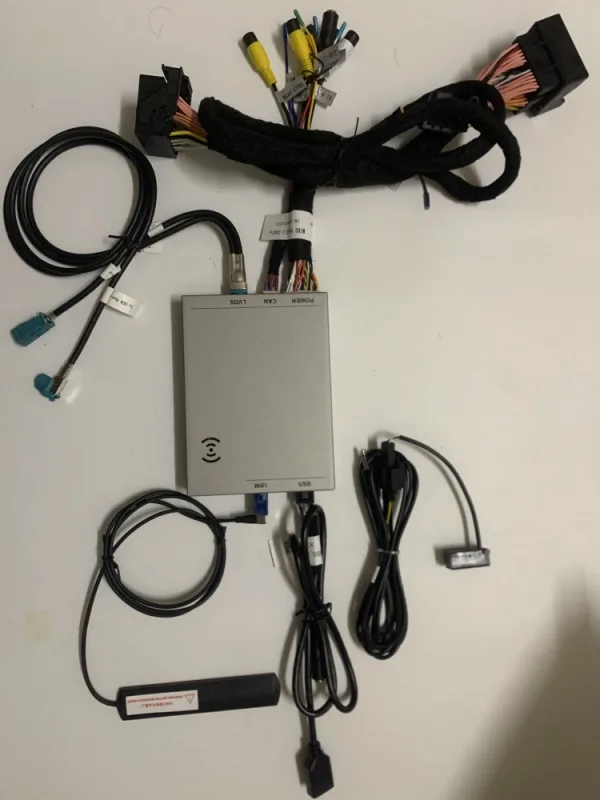
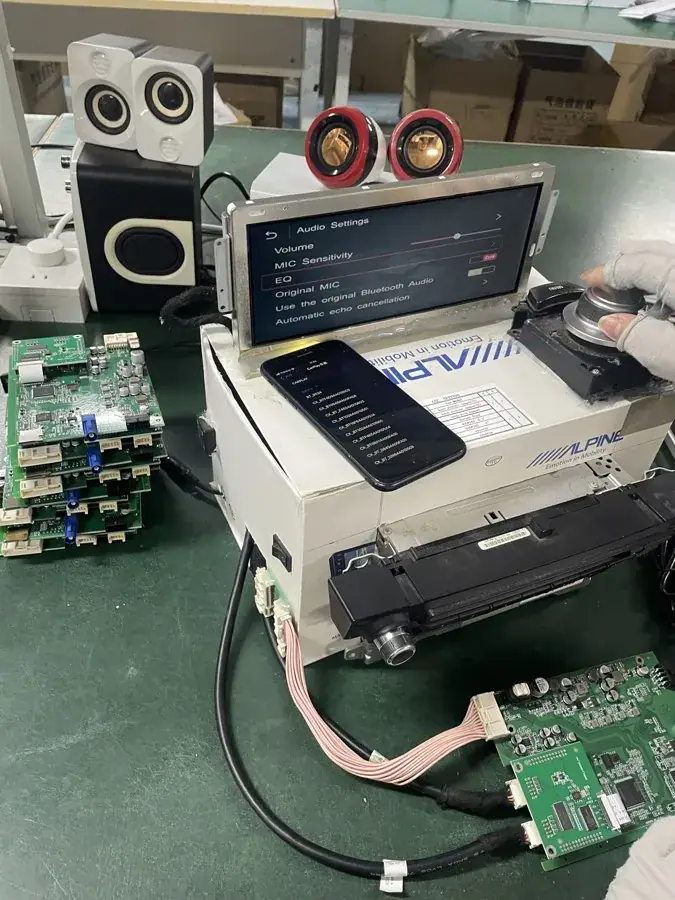
What a retrofit install actually involves
The work splits into five blocks, and only one of them is the electronic connection everyone pictures.
- Trim and bezel removal — pulling the centre bezel, the air vent assembly and sometimes the clock or the hazard switch out of the dashboard.
- Head unit access — sliding or pulling the factory unit forward to reach the display connector, the vehicle network connector and the power pins.
- Harness termination — plugging the module harness into the factory connectors, routing the two antennas, and fixing the module somewhere it will not overheat.
- Menu configuration — a short sequence on the factory head unit to enable the CarPlay source, sometimes through a hidden engineering entry rather than a user setting.
- Function check before refit — confirming wireless pairing, steering wheel control response, reversing camera trigger and audio routing, then reassembling everything.
Only the third and fourth items belong to the module. The first two are the head unit, and the fifth is mostly reassembly. A supplier who quotes two hours per vehicle is quoting the connector step, not the whole job.
Head-unit generation decides the labour, not the module
Two cars carrying the same brand badge can differ by several hours of labour because the generation behind the badge differs. A Mercedes NTG5.0 unit pulls forward on a bracket after the bezel is off; an earlier NTG4 unit needs the console frame partially lowered; an Audi MMI3G takes the trim in a different sequence from an MMI2G unit and exposes its main connector at a different angle. Each is a connector plug-and-play in the electronic sense. Each is a different physical procedure.
| Stage | Typical range | What drives the variance |
|---|---|---|
| Trim and bezel | 15–40 min | Bezel clips versus screws, vent assembly integrated or separate |
| Head unit access | 10–45 min | Console frame must be lowered on some generations |
| Harness and antenna | 10–20 min | Connector keying, pigtail exit, antenna routing |
| Menu enable | 5–15 min | Engineering entry versus standard source menu |
| Check and refit | 10–25 min | Number of trim pieces reseated, cable routing under the sill |
The spread on the second row is the one that matters commercially. Roughly half an hour versus three quarters of an hour on head unit access, repeated across a hundred vehicles, is a labour line item that outweighs any difference in module price. Workshops that quote fixed bay time per model rather than per order tend to lose margin quietly on the deep-dashboard generations.
Why two antennas decide whether the job has to be redone
A wireless link runs on dual-band 5GHz WiFi with 2.4GHz fallback. Two pigtail antennas ship with the module, and where they end up changes the result more than any setting on the head unit.
Metal behind the dashboard is the normal failure case. A pigtail routed along the chassis rail, tucked under a stamped-steel bracket, or pressed against the head unit's own housing will hold a connection on the bench and drop it on the road. Antennas need air and separation from the vehicle's metal structure, which is why the routing step belongs to the install rather than to the box.
Placing them is also the step most often repeated. A module that drops its link after twenty minutes of driving sends the vehicle back to the same bay, and the second visit costs the trim labour twice. The factory integration module supplier who ships installation guidance for a specific head unit is removing that repeat visit, because the routing instruction already accounts for the steel behind that particular dashboard.
The check that happens before the trim goes back on
The functional check is the cheapest insurance in the whole job, and it only works if it happens while the console is still open.
With the trim off and the module live, the following should be confirmed in one pass: the head unit shows the CarPlay source and completes a wireless pairing; the steering wheel volume and track buttons change level and skip; the factory reversing camera image appears when reverse is selected; and audio returns through the original amplifier rather than over a new speaker. Reverse trigger in particular is checked at that moment, because the trigger wire sits at the harness end and becomes inaccessible once the console is closed.
Confirmed with the console open, a failed check costs minutes. Confirmed after reassembly, the same failure costs a second teardown.
What the module changes about workshop economics
Two structural facts about the module matter more to a buyer's labour calculation than its price.
The first is that the factory screen, head unit, original buttons and reversing camera stay in the vehicle. Nothing is removed and nothing is replaced, so there is no old part to stock, no trade-in to grade and no scrap to dispose of. A retrofit line consumes no swap stock.
The second is that the module runs Linux-embedded on an automotive-grade Sunplus chipset rather than an Android-based unit. Nothing on an Android head unit needs re-flashing, no application cache builds up behind the interface, and there is no operating system to update in the years after the fitment. That removes the callbacks an installer would otherwise spend a bay hour on, and it is the practical reason a shop can quote the same bay time for the tenth car as for the first.
| Point of comparison | Retrofitted factory screen with a Linux-embedded module | Aftermarket Android head unit |
|---|---|---|
| Original display and bezel | Kept in the car | Removed; a new panel and adapter frame are fitted |
| Trim work | One removal and one refit | Removal for the original unit, then refit around a different panel |
| System behaviour over years | Fixed embedded Linux, no app cache | Android build with accumulated cache and background apps |
| Ongoing workshop load | None after the fitment | Re-flashing, updates and unrelated complaints |
| Stock to carry | Harnesses for the models being fitted | Full panel inventory per model |
The comparison is structural rather than promotional. An Android unit genuinely solves a different problem — replacing a failed display — and it does that at the cost of the parts and the labour listed above. A retrofit module is for the far larger group of vehicles whose factory screen still works and whose only gap is phone connectivity.
Compatibility breadth decides how few harnesses a shop stocks
Coverage across 300+ vehicle models and series from 2006-2025 sounds like a long parts list until it is grouped by head-unit generation. Most of those vehicles divide into a manageable set of connector families — a BMW F30 or F10 shares its display link with related bodies, a Mercedes NTG4.0 and NTG4.5 behave the same way, an Audi MMI2G and MMI3G generation each cover several model years.
Stocking by family rather than by model is what makes the line economical. A workshop that orders harnesses for six families carries a parts inventory that covers several hundred vehicles, and the compatibility list is what determines whether an incoming vehicle matches a harness already on the shelf or has to wait for one.
The commercial terms follow the same logic. Stock is available from 10 pcs with mixed models allowed, private label runs start at 500 pcs per model, and full OEM firmware programmes start at 1000 pcs per model. Samples take 7-15 days by DHL or FedEx, a production order of 500 pcs or more takes 15-20 days, and a quotation comes back within 12 hours. Payment is 30% deposit with the balance against a copy of the bill of lading, by T/T or PayPal. The sample fee is credited against the first large-volume order.
How the module is verified before it ever reaches a bay
Because the connector step is the only part of the job a supplier controls, it is the part that gets verified at the factory. Each unit is exercised on a bench against real head units: CarPlay interface on the factory display, LVDS hand-off in both directions, CAN wake from the vehicle network, reversing trigger, microphone, and audio out to the original amplifier.
That bench work is not paperwork. It is the reason a shop can order stock without ordering a discovery problem, and it is also why a supplier who is specific about a head-unit generation is usually specific because the bench has that head unit on it.
Apple's own CarPlay support page sets out what the phone-side experience requires, including the strong point of connecting over a 5GHz wireless link. The vehicle side of that pairing is what the module provides: 5GHz dual-band WiFi with 2.4GHz fallback, Linux-embedded on an automotive-grade Sunplus chipset, and a harness that terminates at the factory display link and the vehicle network.
Questions a workshop tends to ask before ordering
How long does a CarPlay retrofit take on a normal head unit?
From 50 to 90 minutes on most models, including the functional check and trim refit. Deep-dashboard generations that require the console frame to be lowered add 20 to 30 minutes. A quote of two hours is realistic only for the harder generations or for a shop that does not count the check.
Does the retrofit need the dashboard trim removed?
On almost every model, yes. Reaching the factory connectors means removing the centre bezel and, on many, the vent assembly or the switch panel around it. This is why trim labour dominates the bay time more than the connection does.
Can a workshop quote a fixed bay time per model?
Yes, and it should. Once a workshop has fitted the same head-unit generation a few times, the steps repeat exactly. Quoting per generation rather than per order keeps the labour line stable and makes the margin visible.
Does the module keep the factory reversing camera working?
Yes. The reverse detection line in the harness sits alongside the display and power connections, so the original camera path stays intact. It should be confirmed before the trim is refitted.
What is the minimum order for a workshop starting out?
Stock is available from 10 pcs with mixed models in one order, which suits a workshop covering several head-unit families without committing volume to any single one.
For bay-time figures on a specific head-unit generation, or for harness stock split by connector family, the fastest route is to send the vehicle list and ask for a fitment sheet. The wholesale programme covers mixed-model stock, private label and full OEM firmware, and a quotation normally comes back within 12 hours. Sample requests can be arranged on request with the model list attached, which is also how a workshop confirms that the vehicles walking through the door are already covered by a harness on the shelf.
Need the Module From This Guide?
Wholesale from 10 pcs (mixed models OK), samples in 7–15 days (DHL/FedEx express). Fitment confirmation within 12 hours.
Request Pricing Check FitmentRelated Resources
- CarPlay Collections — browse by marque family (German, British, Italian, Japanese, luxury)
- CarPlay Fitment Checker — find the module for your car
- CarPlay Decoder FAQ — 34 answers on compatibility, install and wholesale
- CarPlay Retrofit Buying Guide — platform identification & selection
- Wholesale, Private Label & OEM Program — MOQ, lead times, payment terms
- All installation & technical guides