
Published 2026-10-12 · DIYCarPlay Engineering Team · 12 min read
Blink Codes and Status LEDs: How a CarPlay Retrofit Module Reports Its Own Faults
A CarPlay retrofit module that reports its own state turns an installation fault from a guess into a measurement: status LEDs and blink codes show whether the harness powered the module, whether the CAN handshake completed, and whether the LVDS handoff to the factory screen actually succeeded. Most callbacks in this product category are not defective modules. They are seating problems, missing wake signals and mis-pinned connectors that a bench technician can identify in minutes and that otherwise reach the customer as a black screen.
A retrofit module is a Linux-embedded box that sits between the factory head unit and the display link, adding wireless CarPlay over 5GHz dual-band WiFi while the original screen, the steering wheel buttons and the reverse camera path stay exactly where the car put them. Because nothing on the factory side is replaced, nothing on the factory side is covered by a warranty claim when the install goes wrong. That makes diagnosis the only defence a distributor has.
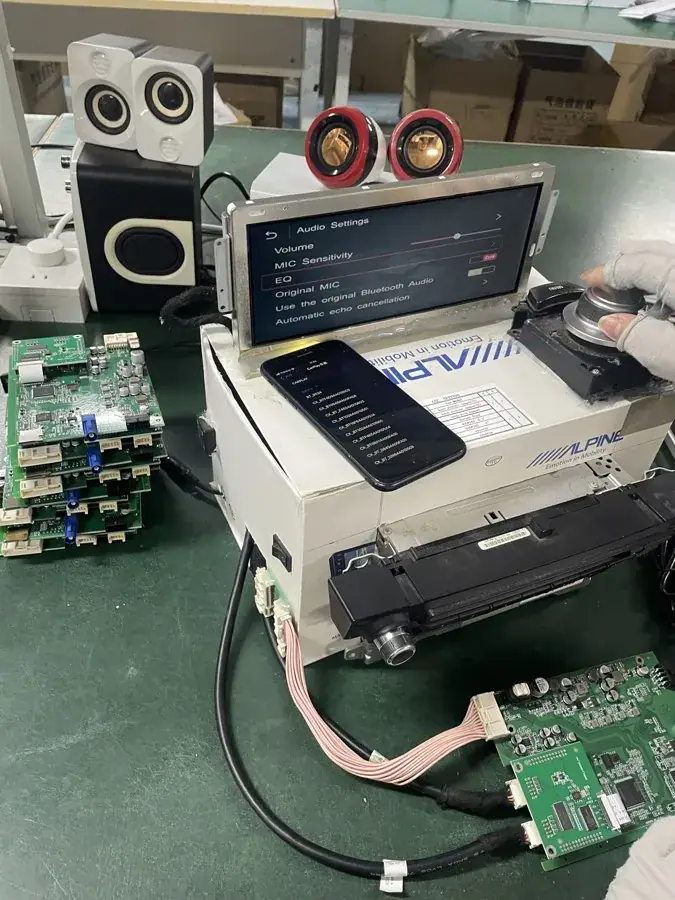
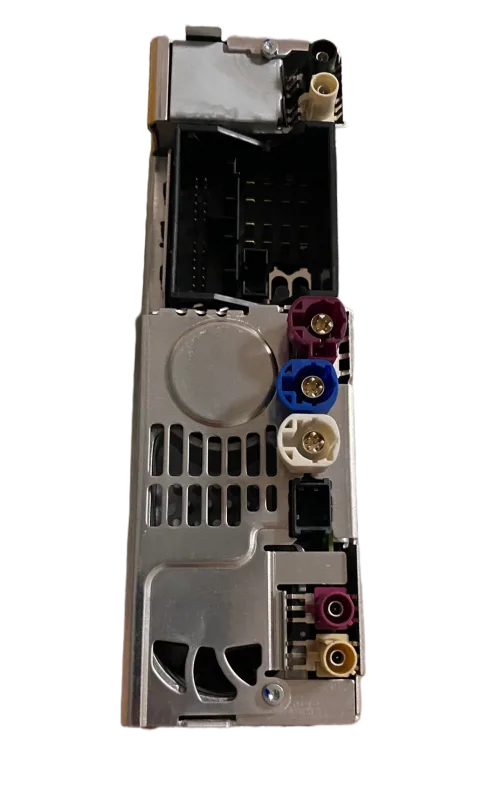
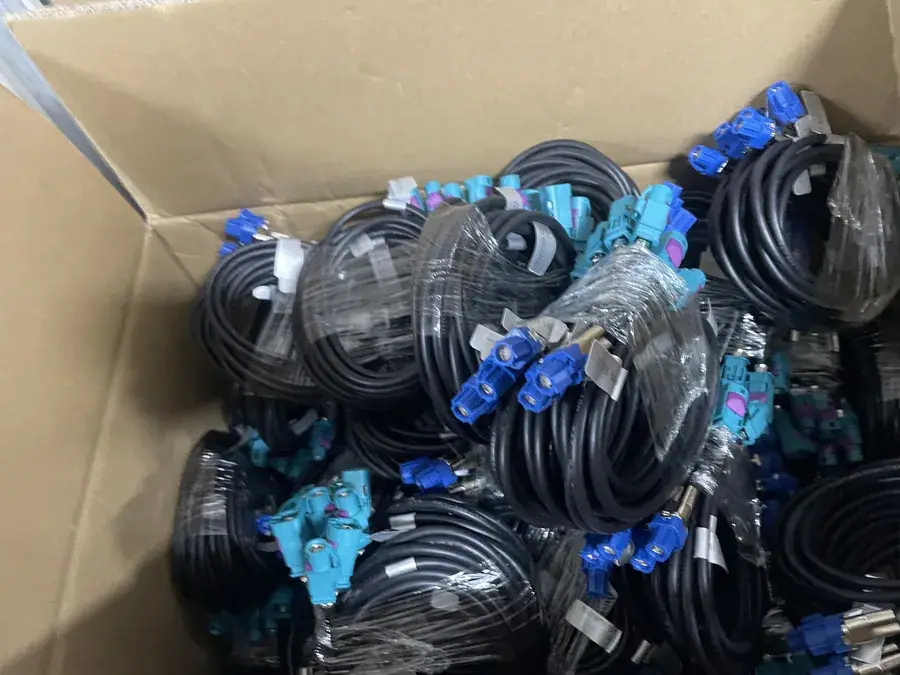
Most retrofit faults are wiring faults, and wiring faults are cheap to fix
Across the 300+ vehicle models and series that a retrofit programme usually covers, the failure modes at installation are remarkably repetitive. The radio does not power. The CAN bus does not wake. A connector seats halfway because the trim clip was not refitted. The reverse trigger wire is on the wrong pin. The screen wakes to the factory menu but never hands over to the module. Each of these presents to the customer as the same sentence — the CarPlay does not work — and each of them has a different, specific fix.
Without a diagnostic output, the installer falls back on swapping parts. Swap the module, swap the harness, swap the head unit. That sequence destroys the margin on a job priced against a small hardware cost, and it teaches the installer nothing, because the faulty part was never identified. With a diagnostic output, the same fault resolves in one step: read the state, replace the cable, sign off.
The four fault classes a pre-delivery check separates
Diagnostic reporting is useful because it partitions faults into classes that have different causes and different remedies. The table below is the working order a technician follows before a car leaves the bay.
| Fault class | What the customer sees | What the module reports | Where the fault actually is |
|---|---|---|---|
| No power | Screen stays dark or shows no CarPlay entry | No status LED at all, not even a wake blink | B+ or ACC tap, ground lug, or the main harness connector behind the head unit |
| Power present, no wake | Module LED lights, but the head unit never hands over | Solid standby LED, no wake pattern after ignition | CAN wake line, reverse trigger, or a head-unit variant that needs a different harness branch |
| Wake without display | Factory menu appears, then goes black when CarPlay starts | Wake pattern followed by a link error code | LVDS or display cable seating, pin order, or an incorrect head-unit generation match |
| Display without audio | CarPlay renders, sound comes from the wrong speaker or not at all | Normal wake and link, audio fault indicated | Audio out branch for that amplifier variant, mute line, or an unamplified factory output |
Read down the third column before touching anything. It converts a vague report into a branch in a decision tree, and in three of the four classes the part that gets replaced is a cable or a connector, not the module.
What a useful blink code actually encodes
A status LED is only worth having if the pattern carries information. A single solid light says the module has power and nothing more. A coded sequence says more: how long the wake window lasted, whether the CAN request was acknowledged, whether the display link trained, and whether the radio associated with a phone.
The engineering requirement is that these states are reported by the module itself rather than by an external tool. An installer working under a dashboard should not need a laptop, a diagnostic connector or a proprietary application to establish whether the module is alive. Reading a code off a harness takes seconds; reading the same state through a service interface takes a workshop bay and a booking.
For a distributor, this changes the economics of support. Most fault tickets that arrive as return-merchandise-authorisation requests are diagnostic questions wearing a return label. When the module can name the failing class, a large share of those tickets close with a photo of a connector and a two-line instruction. Only genuine hardware failures come back, and those are the returns worth paying shipping on.
CAN wake is the step that fails most quietly
Retrofit modules usually wake in one of three ways: an ACC line going live, a CAN message that the body module broadcasts on ignition, or a reverse trigger pulled from the camera circuit. Each platform relies on a different one, and a harness built for the wrong wake source produces a module that powers up and then sits there.
This is the failure that generates the most support traffic, because the module is alive. A status LED confirms power. The installer assumes the module is at fault, because from the outside the symptom matches a dead unit. In practice the fix is usually a different harness branch for that head-unit generation, and the original harness is not a fault at all.
Automotive bus diagnosis is a well-documented discipline rather than a specialist trick, and the reference material on the CAN bus describes why a node that listens but never transmits behaves in exactly this way. Android-style general-purpose infotainment hardware sidesteps the problem by powering on with the accessory circuit and reporting its own errors through a screen. A module that has to live behind a factory dashboard has one LED and no display, which makes coded reporting the only channel available.
Display link errors that look like a dead screen
The second common class is a black screen after the factory menu disappears. The handover is a timed sequence: the module captures the display link, trains the LVDS timing, and only then does the factory head unit stop driving its own output. If the display cable is not fully seated, or if it is seated but on a head unit from a different generation, training fails and the panel goes dark.
Because the car still drives, starts and plays the radio, the customer reports a broken screen rather than a broken CarPlay kit. Diagnosing from the symptom alone sends people looking for a display fault on a display that works perfectly well without the module fitted. A trained module reports the link state directly, which closes that gap in seconds.
Where the module hardware and operating system matter
Two hardware decisions shape how these states get reported. The first is the chipset. An automotive-grade Sunplus part is specified for operating temperature and supply ranges well beyond a consumer part, and it is specified to hold a defined state across a power interruption rather than re-enumerating USB peripherals or re-reading a corrupted configuration.
The second is the operating system. A Linux-embedded build has no application cache to accumulate and no background update process to stall a UI, because there is no application layer of that kind to manage. What that means for diagnosis is practical rather than promotional: the reported state is the state of the system, not the state of a runtime that may be busy. A Linux-embedded module that reports a wake fault is reporting it immediately, and it will report the same fault the next time the same wiring is presented.
The wireless side follows the same logic. A dual-band WiFi radio on 2.4GHz and 5GHz associates, measures and retries in the background, and a 5GHz link that fails to hold will be reported as a link fault rather than as a silent dead screen. That distinction matters, because a link fault is a wiring and placement problem, while a silent screen is a power or handshake problem. Conflating the two is what sends installers replacing modules that were working the whole time.
An aftermarket Android unit answers the same complaint differently
An aftermarket touchscreen unit replaces the original display and runs a general-purpose operating system designed to stay interactive and to surface its own status on that display. It is easier to diagnose because the diagnostic output is the screen. It is also a different product: the original screen is gone, and a general-purpose operating system is the class of system that accumulates background state over years of service.
A Linux-embedded retrofit module keeps the original display and the original car electronics, which is what makes the retrofit acceptable to an owner in the first place. The cost of that choice is that the module has to report through an LED rather than a screen, and that report has to be precise rather than decorative. It is the same trade-off that puts a status LED on an engine, and the same reason the code matters.
A pre-delivery routine that takes minutes
None of this requires specialist equipment. The routine below assumes the module reports its own state and the installer has a multimeter and a test lead.
- Confirm the status LED responds at all. No response means stop and trace power from the battery side; nothing downstream is meaningful.
- Read the wake pattern with the ignition cycled. A module that powers but never completes a wake handshake points at the wake source, not at the radio.
- Pair a phone and start CarPlay before the trim is refitted. Link failures found with the dash open cost minutes; the same failure found with the dash closed costs an hour.
- Select reverse with the camera connected and confirm the handover both ways, then reverse out again.
- Confirm audio leaves the correct output for that vehicle's amplifier variant, and that the factory mute line is handled.
- Cycle the ignition twice to confirm the module returns to its parked state rather than staying awake.
Two faults account for the majority of what remains, and both are visible in the trim: a connector pushed back instead of seated, and a pigtail antenna cable routed against a metal bracket. The pre-delivery check catches them while the dash is still open.
What to settle with a supplier before the first order
Diagnostic behaviour is a specification, and it belongs in the sample agreement rather than in a conversation after the first callback. The questions worth putting in writing are narrow: what states the module reports, through which physical output, and whether the report survives a power interruption. A supplier who answers those precisely has a process behind them.
The commercial terms follow the same logic of removing surprise at delivery. Stock is supplied from 10 pieces with mixed models allowed in one shipment. Private label runs at 500 pieces per model, and Full OEM firmware customisation at 1000 pieces per model. Samples take 7 to 15 days by DHL or FedEx, and a large-volume order of 500 pieces or more takes 15 to 20 days. Quotations come back within 12 hours. Payment is 30% deposit with the balance against a copy of the bill of lading, settled by T/T or PayPal, and the sample cost is deducted from the first large-volume order.
Fitment across the supported range of 300+ vehicle models and series is worth confirming against the actual target list, and the vehicle fitment finder is the fastest way to narrow it before a sample is ordered. Anything above and beyond the standard catalogue — firmware changes, harness variants, branding — should be scoped separately rather than absorbed into a general expectation.
Frequently asked questions
Does every retrofit module report its own fault state?
No. Reporting is a design choice and it varies between suppliers. It should be confirmed during sample evaluation, ideally by unpowering a powered module and checking whether the fault state survives.
Can a module be tested before it goes into the dashboard?
Power, wake and audio paths can be verified on a bench with a head unit and load resistors before the module is fitted. That is how a factory test station is set up, and it is why a unit that passed functional test can still fail on a specific vehicle.
Are coding or programming steps required?
A plug-and-play harness to the factory head unit is designed to avoid them. Some vehicle platforms still require a configuration step, and whether a platform needs one is part of the fitment answer rather than something discovered during the install.
Does the original screen stay in the car?
Yes. The factory screen, head unit, steering wheel buttons and reverse camera stay in place. The module is added alongside them, which is the point of the retrofit.
Will an aftermarket Android unit show faults the same way?
It shows them on its own display. That is a genuine advantage of replacing the screen, and it comes with replacing the screen. The two approaches trade off against each other rather than one being a better version of the other.
Request a sample and verify the diagnostic behaviour
Fault reporting is checkable on a sample within minutes of it arriving, and it is worth checking before a programme is committed. Send the target vehicle list and quantities through the wholesale enquiry form, or contact the team directly; a quotation covering harness configuration and lead times comes back within 12 hours, and we will walk through what the status reporting covers on the platforms named.
Need the Module From This Guide?
Wholesale from 10 pcs (mixed models OK), samples in 7–15 days (DHL/FedEx express). Fitment confirmation within 12 hours.
Request Pricing Check FitmentRelated Resources
- CarPlay Collections — browse by marque family (German, British, Italian, Japanese, luxury)
- CarPlay Fitment Checker — find the module for your car
- CarPlay Decoder FAQ — 34 answers on compatibility, install and wholesale
- CarPlay Retrofit Buying Guide — platform identification & selection
- Wholesale, Private Label & OEM Program — MOQ, lead times, payment terms
- All installation & technical guides